Ever since I made these quesadillas, I’ve been trying to scheme up another tasty dish to put roasted poblanos in.
So far, I’ve come up with these enchiladas and on the horizon, for the fall & winter months, poblano & corn chowder. (It’s going to be off. the. charts.)
But we’re not dwelling on the past or the future, we’re in the present which means enchiladas!
What’s great about these babies, aside from being totally delicious, is that they can be made as a freezer meal for that crazy busy day when you get home and the last thing you want to do is stand over the counter and stove, chopping and cooking dinner. Ya feel me?
I know you do.
So go ahead, pop these in the oven and put on those sweats, curl up on the couch with your favorite book or TV show, and veg like it’s goin’ outta style.
I’ve made these as both a freezer meal and baked as soon as they were prepared and have included instructions for both. Also, I’ve made these with chicken and with refried beans, for a vegetarian version which was just as tasty.
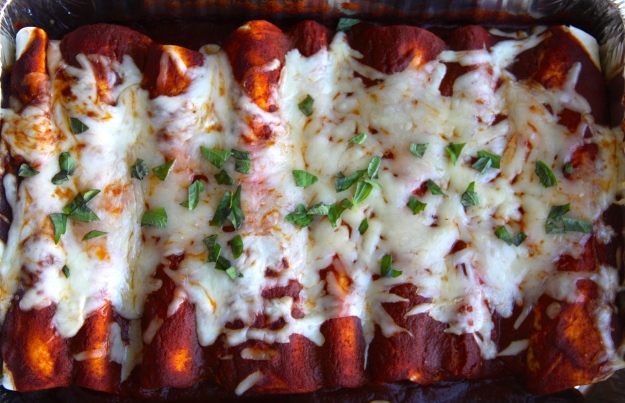
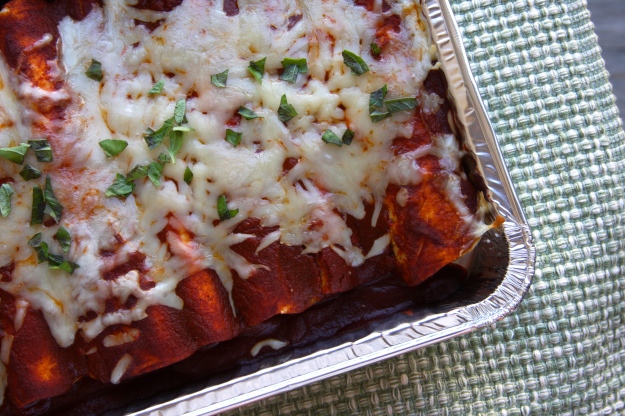
Roasted Poblano & Corn Enchiladas; Recipe or Not
Makes 8 enchiladas
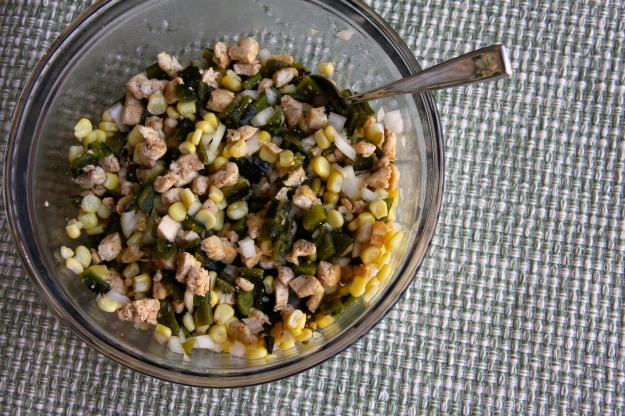
2 poblano peppers, roasted (instructions below)
1 1/2 c. corn, grilled or roasted optional
2 chicken breasts, cooked & diced (I seasoned mine with a pinch of garlic powder, chili powder, cumin, salt & pepper)
OR 1 can refried beans
1/4 of a large onion, diced (should equal about 1/4 – 1/3 cup)
8 tortilla shells
8 oz monterey jack, shredded (4oz in the filling mixture, 4 oz on top)
2 c. enchilada sauce (I used Emeril Lagasse’s Recipe – Food Network)
Cilantro for topping
The Prep: Cook & dice up the chicken breasts. Roast & prepare the poblano peppers. Grill or roast the corn (optional) and dice the onion. Prepare the enchilada sauce. Preheat the oven to 350°. Next, combine the chicken, poblanos, corn, onion, and 4oz of the cheese in a bowl. In a 9×13 baking dish, spoon a layer of the enchilada sauce in the bottom, just enough to cover it. Begin filling the tortilla shells with the poblano & corn mixture, rolling tightly, and laying in the baking dish. If using refried beans, spread each tortilla with a spoonful of beans, then top with the poblanos & corn and roll tightly. Once all the tortilla shells have been filled and put in the pan, pour the rest of the enchilada sauce over the top and cover evenly. Do not include the cheese at this point. Bake for 25 minutes, then remove from the oven. Sprinkle on the remaining cheese and bake for an additional 15 minutes. Let cool a few minutes, top with fresh cilantro, and serve.
Make-ahead directions: Prepare all of the ingredients for the filling and the enchilada sauce based on the directions above. Do not spoon the enchilada sauce in the bottom of the pan for make-ahead enchiladas. Simply fill, roll, and line the tortillas in a freezer safe baking dish. Cover tightly and put in the freezer. After preparing the enchilada sauce, let it cool completely, then transfer it to a freezer safe bag or container and freeze separate from the enchiladas. When you are ready to cook the enchiladas, put the sauce in the fridge the morning of the day you plan to bake them. When you’re ready to bake them, preheat the oven to 375°. Pour the sauce over the enchiladas and bake, covered loosely with aluminum foil for 30-35 minutes. Uncover the enchiladas, top with cheese and continue baking for 15-20 minutes. Let the enchiladas cool a few minutes, top with cilantro, and serve.
Roasting Poblanos; Fine Cooking
Use a gas burner, hot grill, or oven broiler
Blacken the peppers. Turn a burner to high and char the poblanos directly over the flame, turning them until fully blackened. Or use a hot grill or the oven broiler, turning the peppers until they are charred. Immediately after roasting, put the poblanos in a bowl, cover, and set aside to steam and loosen the skins. When cool enough to handle, peel the charred skin off with your hands or a small paring knife. Pull out and discard the stems and seed clusters.

 What’s stuffed to the brim and loaded up with veggies?
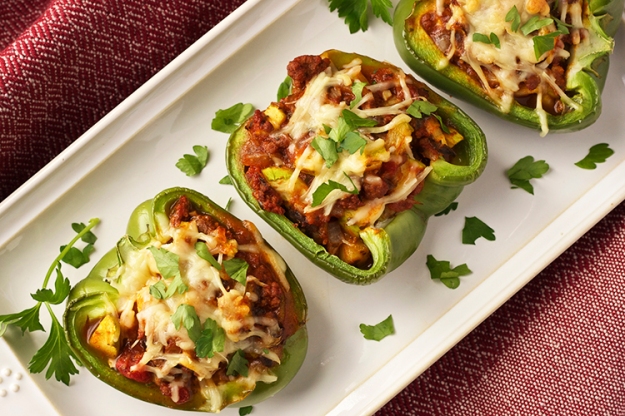 The filling is a combo of Italian sausage (← hello flavor), onions, zucchini, and mushrooms all covered in marinara sauce.